
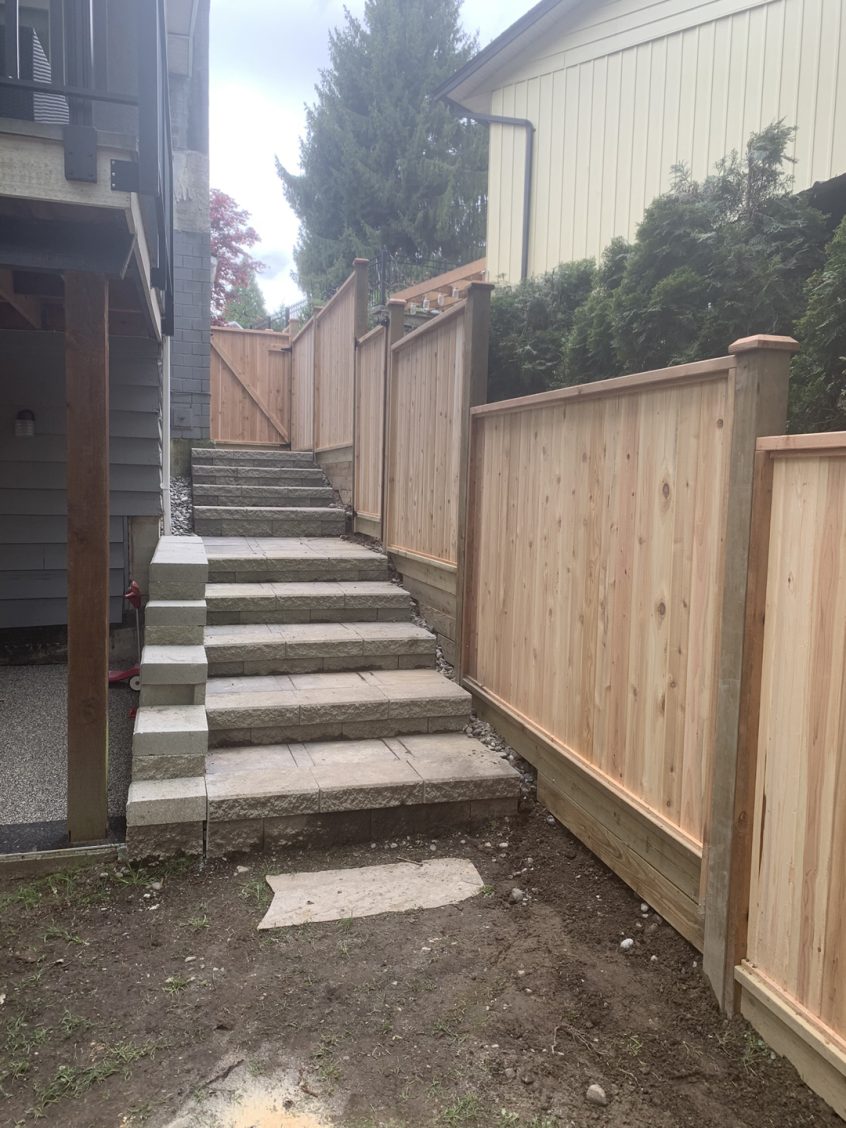
Are you a homeowner dealing with a sloped yard and wondering how to install a fence that actually works with your terrain? If you’re considering cedar fence panels, you’re already on the right track. But building a fence on an incline takes a bit of planning and know-how.
If you’re thinking you may DIY it, or are looking to hire a professional fence installer in the Lower Mainland and the Okanagan, we’ve got you covered. In this guide, you’ll find practical tips, layout ideas, and everything you need to know about installing a wooden fence on sloped ground. Think of it as your go-to resource for turning tricky terrain into a beautiful and functional fence line.
Choosing the Right Cedar Fence Design for a Sloped Yard
If you’ve hired someone for a cedar fence panel installation, it’s important to understand your design options, especially if your yard isn’t perfectly flat. Knowing the pros and cons of each approach can help you make smart decisions so that the final result is up to professional standards.
If you’re leaning toward a hand-built cedar fence, you’ll enjoy maximum flexibility and customization. Since every board is cut and placed individually, the fence can follow the natural contours of your sloped property. This method not only looks more seamless on uneven terrain but also tends to last longer than panel-based installations. The trade-off? Because each piece of lumber is handled and installed by hand, hand-built fences often come with a higher price tag, but for many homeowners, the quality and custom look are worth it.
On the other hand, cedar fence panels are a quicker and more affordable option. They do, however, come with some challenges when they are installed on sloped ground. Panels are pre-built in flat sections, so when they’re installed across uneven terrain, gaps can form between the bottom of the panel and the ground. These gaps can be surprisingly large, depending on the steepness of the slope. To fix this, “fill boards” are often used to close those spaces, but that can affect the look of your fence and increase the total height of your fence.
This is where homeowners need to be careful: if the total height of the fence exceeds your municipality’s height restrictions, you could technically be in violation, even if it’s unintentional. The good news? Many local inspectors overlook this in sloped areas, but it’s still worth keeping in mind during your fence design planning phase. Also, on windy days, taller panel fences can catch gusts of wind more easily, which can also damage your fence. But don’t worry, there are smart ways to reduce that risk. Let’s dive deeper. Here’s how to install a cedar panel fence on sloped terrain:
The Sloped Cedar Fence Panel Installation Guide
Here’s how to install a cedar panel fence on sloped terrain:
Planning & Material: Measure the slope.
Before embarking on the installation of your cedar fence panels, it’s important to understand how steep your slope is, including post length, fill board amount, and fence height. An easy way to find the average slope height per panel is by measuring out the standard 8-foot panel length horizontally/level to your slope line; A stake can be used to mark this rise. Then, measure straight down from that point; That vertical drop tells you how much height the slope adds to each fence section.
Why does this matter? The steeper the slope, the taller your fence will end up on the downhill side, which means you’ll need taller posts and more fill boards. To make sure your fence stays standing strong in heavy winds, you’ll want to bury the posts deeper to help distribute that added pressure.
Set End Posts
The end post at the top of the sloped line can be set first. The end posts set the string line for your fence that will follow. When you’re building a cedar fence, whether on a sloped grade or flat, setting your posts correctly is key to the entire structure’s stability, especially in windy areas. Make sure the post is set at least two feet deep into the ground, measured from the lowest part of grade around the top of the hole, to provide resistance to lateral pressure and stay upright over time. For extra support, it’s a good idea to reinforce the resistance by backfilling the hole with a high-compaction-rate material (like concrete or packed gravel). This helps the post resist movement and offers a strong anchor.
Start from the Bottom
With total fence height in mind, you can start digging the holes for the posts at the bottom of the fence line. Usually, for a 6ft fence, the holes need to be about 2ft deep. But if your fence is going to be built on a slope, it’s best practice to add 6 inches to the depth of the hole at a minimum for each 1.5 feet of height added by the slope. It is best to make the hole deeper than this if possible.
After you have installed this post and set up the string line, the bottom of the fence line will be your starting point.
Fill Boards
Install fill boards horizontally/level, typically pressure-treated lumber, by attaching them to the post on one side, and into the ground along the fence line. By burying the fill boards at least 3 inches into the grade, you will give lateral support. Stack lumber and continue this pattern until you achieve your desired post spacing (cedar fence panels are usually 8ft, but measure each panel ).
Pro Tip: It’s a good idea to add a 1/16th or 1/32nd of extra space between posts when installing posts ahead of panel installation to give room for the Panel.
Post, Panel, Repeat.
Once you’ve measured your slope and planned your layout, it’s time to get to work. Start by digging your post hole and setting your post securely.
* Remember to go deep enough to handle any extra height caused by the slope.*
Once your post is in place, attach your cedar fence panel, making any necessary adjustments for gaps or angles. Then, move on to the next section and repeat the process along the slope. With a bit of patience, you’ll end up with the perfect fence (built on a sloped terrain).
Cedar Fence Panels: The Perfect Solution for Sloped Terrain!
Installing a fence on sloped ground can be intimidating, but with the right fence design, plan, and materials, it’s totally doable. Cedar fence panels are a great choice for homeowners in the Okanagan and Lower Mainland looking for a fence that fits the natural shape of their landscape. If you think a DIY project might be out of your scope, consider phoning the pros.
At Frontline Fencing, we specialize in building fences that look great and are built to withstand BC’s diverse sloped terrains and weather conditions. As one of the best fencing companies in Vancouver and the Lower Mainland, we’re here to help bring your project to life. Sloped terrains got nothing on us. We’re experts in building high-quality custom fences.
We’ll help you build a custom fence tailored to your sloped yard. Contact Frontline Fencing today for a free estimate and advice on your cedar fence panel installation.